


Introduction
Greetings, Legacy community! We got many requests to cover this article recently, so today we're going to talk about Goku and Vegeta, Sonic and Knuckles, Daniel LaRusso and Johnny Lawrence, that is, old rivals that became great friends.
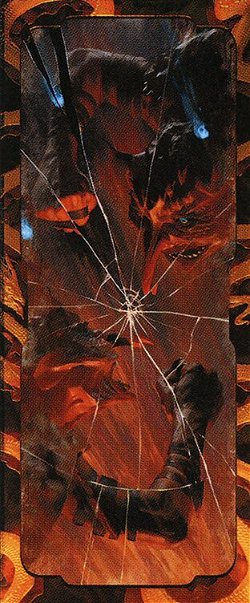
Yes, today we'll discuss Urza's Saga and Blood Moon!

There's a Full Moon in the Sky
Blood Moon at the center of Red Stompy - also known as Red Prison, Dragon Stompy, Moon Stompy, and numerous other names - has been an important part of Legacy for decades. For years, we had to keep this card in mind whenever we built a deck: am I being too greedy with my mana base to the point I automatically lose to a turn 1 Blood Moon?
Sometimes high up in heaven, sometimes way down in hell, this deck has remained in the meta as one of the main Ancient Tomb decks. When Modern Horizons 2 came out, Blood Moon got a new job: because of the way Saga enchantments interacted with other cards when they were lands, Moon became one of the best answers to the strongest Modern Horizons 2 card - Urza's Saga. Resolving this powerful enchantment (or similar effects, like Magus of the Moon) killed this Saga instantly. For years, Moon effects were only valuable if Urza's Saga was popular in the format.
But this power dynamic was turned upside down when Final Fantasy![]() came along and changed this interaction. Now, instead of killing it, Moon freezes the Saga as it is. So, if you freeze it when it only has one lore counter, it can still create colorless mana. If you do it when it has two lore counters, it can still create Construct tokens, and, in both cases, it no longer progresses to its imminent death when it gets the third lore counter.
came along and changed this interaction. Now, instead of killing it, Moon freezes the Saga as it is. So, if you freeze it when it only has one lore counter, it can still create colorless mana. If you do it when it has two lore counters, it can still create Construct tokens, and, in both cases, it no longer progresses to its imminent death when it gets the third lore counter.
Straight away, this change seemed like a terrible blow to this deck because then it was no longer the main answer to one of the most relevant cards in the format. But then we asked ourselves: why not use both of them together now that, instead of Moon destroying the Saga, it lets us create Constructs forever? Anyone who has ever lost a game when their opponent activated chapter 2 of the Saga (I know I lost more than once to it) can agree that activating it countless times will be incredible.
Building Urza's Red Saga
This Red Stompy version quickly spread throughout the format, now with another way to create value and put pressure on the opponent. Now that this deck can play Sol Lands and Chrome Mox, it can naturally create tokens as early as turn 2. Furthermore, though they won't get as big as they would in decks like Artifact Blue or Saga Storm, from Moxes to Treasures, it'll give us enough material to earn our respect.
Another thing this Saga lets us do with this deck is play cards to deal with graveyards already in the main deck. It also lets us play a few "toolbox cards" for certain situations, like Pithing Needle and Lavaspur Boots. Boots, in fact, is particularly interesting with Fable of the Mirror-Breaker's other side. Furthermore, the third chapter of the Saga can always find a Chrome Mox and fix our mana for us.
The rest of the deck is quite similar to the standard list from before the rule change was introduced, except for 2 of the 8 Moon effects, which we replaced for 2 Urza's Saga targets - Soul-Guide Lantern and Lavaspur Boots. Ironically, the overall consensus was that we'd give up 2 Blood Moon instead of 2 Magus of the Moon. That is because, though Magus is usually more vulnerable than Blood Moon, it is naturally resistant to Boseiju, Who Endures and Force of Vigor (which happen to be two of the main answers decks that most struggle with this effect use) and can also push some damage through when its effect isn't that relevant.
Why Play this Deck?
Decks that play Prison elements (that is, decks that disable certain game mechanics in a symmetrical way - apparently - but prepare themselves beforehand and don't struggle with these effects as much as their opponents do) often attract a lot of players. In that sense, Red Stompy is one of the most successful decks in the format, even though recently Eldrazi decks have been conquering some space as those types of decks as well.
The greatest advantage you'll have when you play this Saga version instead of the original version without it is that you'll have more answers in the main deck against the most popular deck in the format, Dimir Reanimator. You'll also have more answers to some problematic cards, like Barrowgoyf and Murktide Regent, be it Soul-Guide Lantern (which makes Goyf smaller and disrupts Regent's Delve) or Shadowspear (which makes the "lifepoints race" balanced because of its lifelink).
Mulligan
Stompy decks are, aside from combo decks, the decks that most rely on mulligans because they don't play cards like Brainstorm or Ponder, so you can't fix your opening hand.
This means your opening hand needs to do something already on turn 1, or, at most, on turn 2. Against a few decks, and especially if you're not playing first, not even opening hands that do something on turn 2 are worth it. As this deck has a lot of acceleration and The One Ring to get your investment back in cards, you can abandon hands with 6 or 7 cards if they don't have enough resources.
Let's see a few examples:
This hand is almost entirely terrible - its only redeemable quality is that it has an answer for graveyards. So, it is acceptable against Reanimator, though it is too slow to return fire. You can find a reason to keep this hand against this deck if you're playing first. If you're drawing first, you're vulnerable to Daze as well. Verdict: Mulligan it, except against Dimir Reanimator and if you're playing first.
This hand is extremely risky, but there is a reason to keep it: it can play Chalice for 1 on turn 1 and Fable on turn 2 if you find a source of mana (or try again with the Chalice if your opponent countered the first one). On the other side, it relies too much on the top of the deck to find mana and could crumble very easily if your opponent plays a Wasteland. Verdict: I'd mulligan it, but I'm not against keeping it. Just keep in mind it is a risky opening hand.
You can easily keep this hand. All you'll have to do is play these cards in a different order if you know what you're playing against. If I had to go into a match blindly with it, I'd play Tomb, Lavaspur Boots, Mox, then imprint Pyrogoyf and follow with Chalice for 1. This sequence already lets me play the Fable and equip the token on turn 2. If Chalice isn't efficient against my opponent, like against Mirror or Eldrazi, and I know that, I'd play Fable on turn 1. Verdict: Keep it.
This hand is very similar to the hand above, but it doesn't have as many lands, so I wouldn't necessarily exile Spirit Guide with Mox. Once again, if you know what your opponent is playing, you can play a different order. Against a few decks, the best strategy is playing Magus on turn 1, though if you do this, you'll need to draw other sources of mana. Verdict: Keep it.
Building the Sideboard
You can easily tell this list was built for the online meta - it has 6 cards to deal with graveyards, including 4 Leylines to improve the Oops All Spells matchup. A card that stood out to me was the 4 Disruptor Flute. They are a generic answer to deal with numerous other cards, like Karn, the Great Creator or Nomads en-Kor, but they also make one of your worst opponents a bit less scary: Show and Tell. Against these decks, they act as a Meddling Mage of sorts and should prevent your opponents from playing the sorcery that ends the game on the spot.
Fiery Confluence became a lot more valuable when Tezzeret, Cruel Captain decks became more popular, as both Forge Combo, Artifact Blue, and the new Affinity lists use Pinnacle Emissary. Furthermore, this card is useful against other Aggro decks, like the Mirror or Death and Taxes.
Finally, this sideboard includes two tools from Urza's Saga's kit: Pithing Needle, which is useful against Forge, Painter, and Nadu, and Shadowspear, which is excellent against Aggro decks.
Sideboard Guide
I'd like to thank the Discord Red Stompy server that helped me write this sideboard guide. Thanks, you guys!
Dimir Reanimator
If you're playing first, your Moon effects can win the game by themselves because your opponent usually only plays 2 basic lands. However, if you're drawing first, they'll have time to use a fetch land and find what they need. You can't really answer them when they play the explosive Entomb + Reanimate strategy when they're drawing first, unless you manage to fit in a Chalice of the Void for 1. If the game stretches on for a little longer, the Saga can find Soul-Guide Lantern for you and prevent them from reanimating their stuff for at least one round.
Your anti-graveyard cards are self-explanatory, but Shadowspear earned a spot because it is useful against Barrowgoyf, one of the ways they typically win post-side.
In:
Out:
- When playing first:
- When drawing first:
Dimir Aggro
Against this opponent, the list with the Saga is tremendously better than the list without because you'll be able to deal with their Barrowgoyf more efficiently. Post-side, Needle is an answer to Tamiyo, Seasoned Scholar.
In:
Out:
Mirror
Obviously, in game 1, both of you will be full of dead cards, and, typically, whoever draws less of them ends up ahead. Fable of the Mirror-Breaker is the best card in the game, followed closely by Broadside Bombardiers and The One Ring.
Post-side, Fiery Confluence and Shadowspear need no introduction, but Needle and Flute do. We didn't include them for this matchup, but they're useful if your opponent drew their key cards, like The One Ring or Broadside Bombardiers, before you could, and now you need to deal with them.
In:
Out:
Forge Combo
Game 1 will be quite complicated, particularly now that your Moons don't kill Sagas anymore. Chalice of the Void can disrupt them, but you'll have to guess the cost of the cards in their hands correctly. If you play Chalice for 1 when they have lots of Lotus Petal and Mox Opal, or Chalice for 0 against several Manifold Key, you'll make your life a lot harder, so it's tough. Furthermore, the main deck doesn't have efficient answers against The One Ring. Fury can at least hit Karn the Great Creator and Tezzeret, Cruel Captain, for instance. Post-side, you'll have all your Flutes and Needles, so you'll be better prepared to ruin their day.
In:
Out:
Show and Tell
As a Red Prison player, I have nightmares about this deck. It is, by far, your worst opponent. I usually joke that, even if you had the opening hand of your dreams and drew perfectly, there is absolutely nothing you can do if they simply "have" the combo. You'll do your best to disrupt their game plan, but you should still pray luck is not on their side that day.
Post-side, just like we mentioned above, pray your Flutes give you enough time to push some damage through. That's why you'll also get your Confluence - to try to push 6 damage, that's all.
In:
Out:
Final Words
If you are familiar with my other Cards Realm articles, then you know this is one of my favorite Legacy decks. The Saga rule change that caught everyone off-guard also gave it a breath of fresh air and made it even more interesting. In fact, I started writing this guide last month, but then some new cards came along, and we were only able to release it now.
What do you think? Tell us your thoughts in our comment section below.
Thank you for reading, and see you next time!


— Kommentare 0
, Reaktionen 1
Sei der erste der kommentiert