


Introduction
Welcome to another Deck Tech! This time, we'll enhance a deck dedicated to one of the most charismatic and mentally questionable characters in LOTR. We're talking about Sméagol, a Hobbit tormented by his two personalities due to The One Ring curse.
We'll bring him onto the battlefield with all his not-entirely-willing tricks and abilities to face our opponents.
The Commander

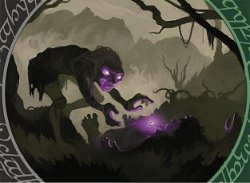
Sméagol, Helpful Guide is divided into two abilities which will help guide us during the development and understanding of this deck tech. As you can observe, these abilities are directly connected to the death of creatures on the battlefield under the control of the player (this deck's player) and the constant activation of the passive ability "The Ring Tempts You".
Therefore, this deck's proposal will be aligned with mechanics such as Landfall, Sacrifice, "The Ring Tempts You", and the use of effects connected to the death of creatures. With that in mind, let's develop a list which can extract as much synergy between this commander and the possible indicated mechanics as possible.
Deck Tech
In this topic, we'll point out the mechanics we'll use to build and enhance our strategy, keeping in mind the focus on the constant death of creatures under our control, the consequences of these effects, LOTR-themed cards, and the abilities connected to the use of lands.
Enough Sacrifices to Fill an Entire Graveyard?!
As noted before, the effects created by the death of creatures in this deck tech are one of our focus, which is why we'll observe types of cards which activate such abilities, benefitting from them or creating several consequences, so we can take the lead during our matches.
Next, we'll analyze in this strategy the use of effects which extract more uses overall and are directly connected to the deaths of our creatures, creating continuous advantages in our favor, such as:
To finish, we have effects which harm our opponents in some way, establishing control against their plays and even showing potential as win conditions:
“The Ring Tempts You”
Just like Sméagol, we'll be tempted by The One Ring! Hence, one of the strategies in this deck is activating this ability as many times as possible per turn. This way, we'll extract as much advantage as we can out of what our commander can offer us, always stealing lands and undermining the cards left as they end up milled by his ability, and reducing our opponent's resources.
To do so, we'll use cards which activate "The Ring Tempts You", as you can see below:
Such options were listed because of their flexibility, besides having great synergy, as effects such as card draw with Call of the Ring, creature recovery with Sam's Desperate Rescue or even sacrifice fodder with Mirrormere Guardian and Uruk-hai Berserker, are very advantageous options for our strategy.
Landfall
We'll use the Landfall mechanic, whose main goal is amplifying this deck's strategic advantage, due to the synergy with our commander. However, it is important we note that usually Landfall decks use their own lands to use advanced mechanics, such as bringing lands to the board, sacrifice and reuse of these lands, which isn't particularly our focus.
Anyhow, we'll use known cards with this mechanic:
Landfall cards perform countless roles in this deck, such as amplifying the battlefield by creating creatures which are useful as sacrifice fodder with Scute Swarm and Sporemound, or even powerful as a force in combat, such as Rampaging Baloths and Avenger of Zendikar.
We also create resources and speed up our plays with Lotus Cobra, Tireless Provisioner, Tireless Tracker and Courser of Kruphix. This way, with these good examples, it becomes clear why this is such as strong and viable mechanic for this strategy.
The Deck
By observing this list, we can define it as a Midrange Aggro deck, because it has a cadenced strategy. It has the tendency to grow through the game's big plays with creatures, spells and artifacts, giving special emphasis to creatures which sacrifice themselves and connect to the commander.
Another relevant factor in this strategy is the constant pressure the deck puts on its opponents, be it by breaking their decks during the use of the commander's ability, or by delaying the creatures under their control due to combat and removals. That creates brief control cycles, followed by a continuous increase in creatures which establish a horizontal battlefield in favor of this strategy.
Putting the Strategy to the Test!
It is important we think about how we'll pilot this type of deck during our matches, as there is some decision-making which can affect our win condition.
For that, we'll point out here some important actions related to our game style.
I believe the first step is: always concentrate on boosting your game state in relation to your opponents'. That means all actions that increase the number of lands on the battlefield are a good starting point, followed by establishing the battlefield in synergy with Courser of Kruphix, Tireless Provisioner and Tireless Tracker and playing support cards such as Moldervine Reclamation or Mirror Shield so that we can then use our commander.
I don't recommend you cast your commander too early, as it represents a certain threat on board. For that reason, use it when you're sure you can extract a good play with him right afterward.
Evidently, opponents will try to remove him from the board. This way, always hoard recovery resources, such as Meren of Clan Nel Toth, Rise of the Witch-king, Victimize and Nissa of Shadowed Boughs, so you can bring back the commander from the graveyard to your board. Try to avoid, as much as you can, putting him in the command zone, this way preventing its additional cost and delay in battle strategy, as the commander is an essential piece.
A Combo to Dominate Them All
Our deck has the potential to grow on the battlefield with creatures, which can assure you a win through its Aggro side. We also have Combo plays - which can be relatively complex, but very fun, within our strategy.
For example, we'll use Dúnedain Rangers in synergy with our commander. With its ability, we'll transform all creature tokens which go on the battlefield into Ring-bearers in an almost infinite sequence. For that, we'll use any card which creates tokens continuously, such as, for instance, Zendikar's Roil. After that, we'll use another card that sacrifices creatures repeatably and with no additional cost, such as Carrion Feeder.
Here is an example of this combo's sequence of actions:
1º - We play a land and trigger Dúnedain Rangers and Zendikar's Roil's abilities;
2º - We'll choose the order it resolves: first Zendikar's Roil, creating a 2/2 Elemental token, and then transforming this unit into our Ring-bearer with Dúnedain Rangers's ability;
3º - Consequently, the commander's ability will go on the stack;
4º - We'll announce to our opponents we'll keep priority, and, before the ability is resolved by your commander, we'll sacrifice the 2/2 Elemental token, using Carrion Feeder's ability and resolving it;
5º - The commander's triggered ability will resolve after that, this way creating a constant cycle of Landfall effects, "The Ring Tempts You" effects, and Sacrifice.
This combo is very iconic, as it uses the main strategies in the deck. At the end of this play, all your opponents' lands will go onto our battlefield and the other cards revealed will be milled into the graveyard, leaving our opponents with no cards left in their decks, this way ending the game.
We should note Bloodghast is a card which can potentially create combo plays similar to the one presented above, and that Bastion of Remembrance, Syr Konrad, the Grim and Retreat to Hagra are cards which, if present on our battlefield during these plays, can amplify our win condition, due to their synergies - assuring even more possible plays that can lead to the success of this strategy!
Online Version (MTG Arena)
Here we have a special list for you, Magic Arena player! In this build, we kept the essence and strategy of the deck presented in this article, but we used viable and optimized replacements, because, as we know, online, we'll play Historic Brawl due to the unavailability of Commander, and we'll have some key differences regarding this deck's build.
Budget Version
The Budget version is quite simple to build, as the deck itself already has a significant number of accessible cards. Therefore, adjusting a certain upgrade or downgrade is quite easy, and, due to its mechanics and core cards, the array of options is wide and rather timely for players who enjoy exploring new options and also saving money.
Card Suggestion
We also have some powerful cards which aren't in this list, but are worth noting in case any players want to use them:
These are the cursed Black Riders, which were once the 9 Human Kings who succumbed to The One Ring! Nazgûl and similar cards can be used in this strategy, which isn't the case for our deck tech in particular. But they're worth an honorable mention.
Final Words
This concludes another deck tech. I must say it is very positive to see this type of deckbuilding, not only because it has a theme which is fun, familiar, and at the same time innovative due to the LOTR cards, but also because it is an accessible deck, strategically speaking, for players who are just starting out and for experienced players too. Besides that, it is possible to delve even deeper and create even more powerful versions.
Now it's your time to give your opinion! Did you enjoy this article? What is your favorite play in this build? Would you do something different or even more innovative? Don't forget to leave your comments, critiques, suggestions and opinions, so we can continue to grow and learn together. See you soon!


— Comments 0
, Reactions 1
Be the first to comment